Recessed Lighting Installation - A Home Guide
Thinking about making your living space feel more open and bright? Maybe you are looking for ways to show off some special parts of your room. Recessed lights, sometimes called pot lights or downlights, offer a way to get light into a room without anything hanging down from the top. They sit right inside the ceiling, which gives a very smooth and clean look. This can really change how a room feels, making it seem bigger and more modern. So, it's almost like the light just comes from nowhere, which is pretty neat.
A lot of people wonder if putting in these kinds of lights means tearing apart their entire ceiling. That idea can feel a bit much, you know? But the good news is that you don't always have to go through a huge construction project. With some clever thinking and a few smart approaches for home updates, you can actually add these lights without a big, messy overhaul. This means you can get that sleek appearance you want, and honestly, it's often much simpler than you might think.
This guide will walk you through what you need to know about getting these lights set up in your home. We'll talk about what they are, why they are a popular choice, and how to go about putting them in, from the first ideas to the final touches. We'll even look at different kinds, like those with a separate housing and those that are all one piece. You'll get to learn about planning where they go, cutting the holes, putting the light pieces in place, and making sure everything is connected correctly. Basically, we’ll cover it all, so you can make your home feel inviting and well-lit.
Table of Contents
What Exactly Is Recessed Lighting Anyway?
Why Consider Recessed Lighting for Your Place?
How Do You Plan for a Recessed Lighting Installation?
Gathering Your Supplies for Recessed Lighting Installation
Can You Really Install Recessed Lights Without a Huge Mess?
Putting in Your Recessed Lighting - A Step-by-Step Walkthrough
Choosing the Right Look for Your Recessed Lighting Installation
Finishing Up Your Recessed Lighting Project
What Exactly Is Recessed Lighting Anyway?
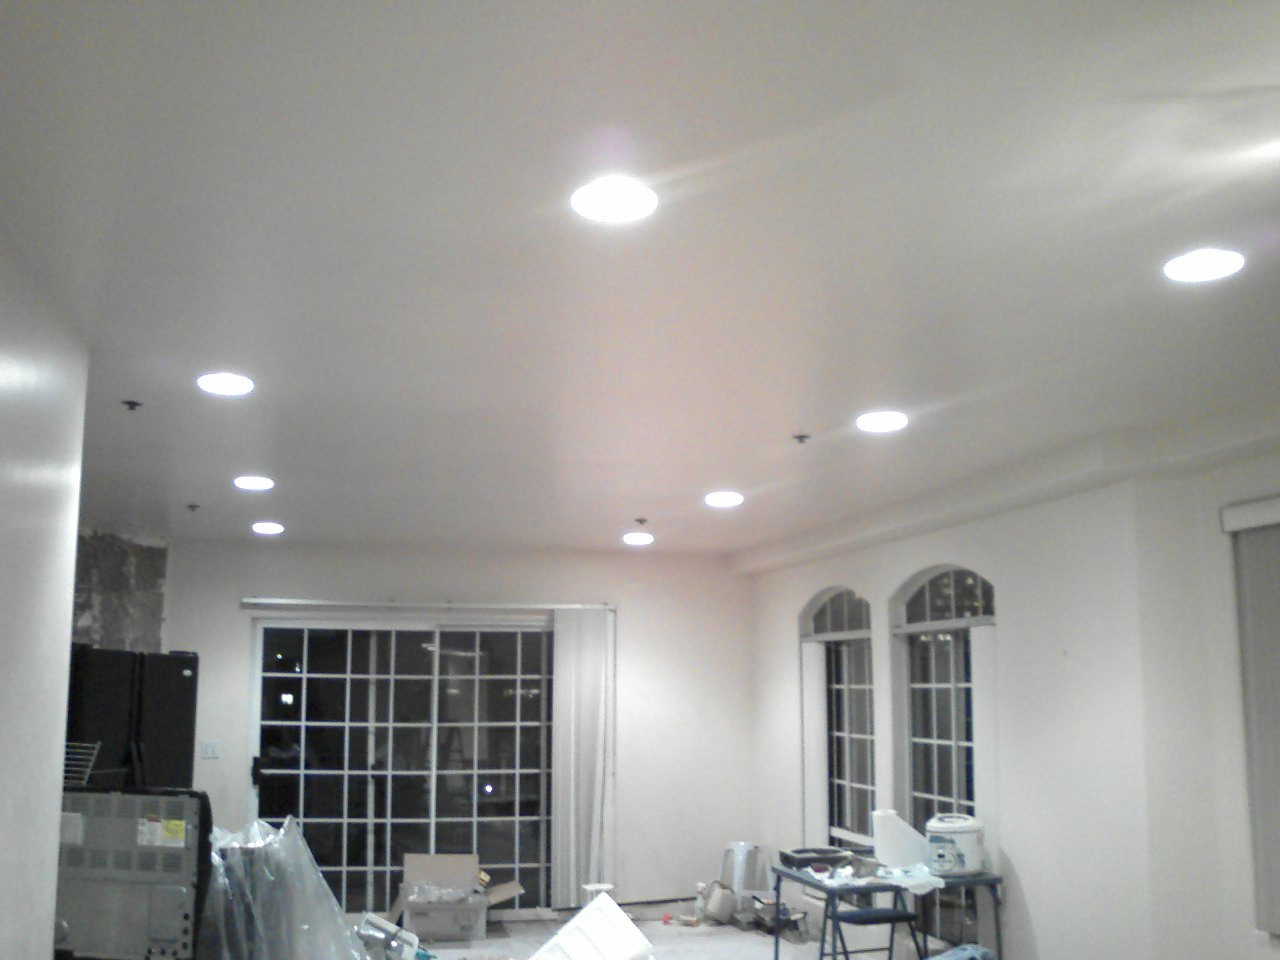
When people talk about recessed lighting, they are usually referring to light fixtures that are put into the ceiling itself. This means that instead of having a light fixture hang down from above, like a chandelier or a pendant lamp, the light source sits back inside the ceiling. The part you see is just the trim, which is the decorative ring or cover around the light bulb, and the light itself. This creates a very smooth and uninterrupted surface on your ceiling, which can make a room feel much more open and clean. It's kind of like the light is just built right into the room’s structure, you know?
These types of lights go by a few different names, too. You might hear them called "can lights" because the main part of the fixture, the housing, often looks like a metal can that goes up into the ceiling space. Or, they might be referred to as "downlights" because, well, they shine light straight down. Regardless of what you call them, their main purpose is to offer illumination without being visually intrusive. They become a part of the architecture, rather than a separate piece of decoration. This is actually a pretty big deal for modern home designs, as a matter of fact.
There are a couple of main styles of these lights you might come across during a recessed lighting installation. Some have a separate housing that gets put into the ceiling, and then the light bulb and trim fit into that. Others are "canless," meaning the light source, housing, and trim are all one connected piece. These canless ones are often a bit slimmer and might be easier to put into tighter spaces, which is something to think about. Both kinds offer that clean, flush appearance, but the way they are put in can be a little different.
The core idea behind these lights is to provide general illumination for a room, or to draw attention to certain areas or objects. They can create a soft, even light across a whole space, or they can be aimed to highlight a piece of art, a fireplace, or a bookshelf. It's really about how you choose to use them and where you put them. You can get different kinds of light output, from a wide flood of light to a more focused beam. This versatility is, in some respects, one of their biggest appeals.
Why Consider Recessed Lighting for Your Place?
There are many good reasons why people choose to put recessed lights into their homes. One of the main ones is the look they create. They give a very neat and clean appearance, making a room feel more up-to-date and open. Since they don't hang down, they don't get in the way of your view or make a ceiling feel lower than it is. This is especially useful in rooms with lower ceilings, where traditional hanging lights might feel a bit too much or even be a bit of a hazard.
Another big benefit is the kind of light they provide. Recessed lights are very good at giving what's called "ambient lighting." This means they can spread a soft, general light throughout a room, making it feel bright and inviting without any harsh glares. This kind of lighting is pretty much the foundation for how a room feels. You can also use them to bring attention to specific things, like a painting you love or a collection on a shelf. This ability to both light up a whole room and focus on details is very handy, actually.
They also offer a lot of flexibility in how you light a space. You can put them on dimmer switches, which lets you change the brightness to fit the mood or activity. Need bright light for cooking? Turn them all the way up. Want a cozy feeling for watching a movie? Dim them down low. This control over the atmosphere is a significant advantage. Plus, because they are hidden, they don't compete with other decorative elements in your room. They just do their job quietly, letting your furniture and art be the stars. This really helps create a streamlined look, as a matter of fact.
For anyone thinking about making their home feel more modern or just tidier, a recessed lighting installation is often a good way to go. They take up no visual space, which can make smaller rooms feel larger and more airy. They also work well with different kinds of room designs, from very contemporary to more traditional. It's a way to update your home's lighting without having to make huge structural changes, which is a pretty big plus for many homeowners.
How Do You Plan for a Recessed Lighting Installation?
Before you even think about cutting holes in your ceiling, a bit of careful thought about your recessed lighting installation is really important. It's not just about picking a light fixture you like; it’s about figuring out where it will go and what kind of light it will give. This planning step helps make sure you get the result you want and avoid any surprises later on. You want the lights to actually do what you need them to do, right?
First, think about the room's purpose. Is it a kitchen where you need bright, even light for preparing food? Or is it a living room where you want a softer, more relaxed feel? The kind of room will guide how many lights you need and where they should be placed. You might also consider what you want to light up. Do you have a big wall of books or a piece of art that you want to highlight? These things will influence your layout. Generally, you want to make sure the light spreads evenly across the space, so there are no dark spots.
Then, there are the actual details of the lights themselves. You'll need to think about their size. Recessed lights come in various diameters, and the size often depends on the overall effect you're going for and the amount of space available above your ceiling. The "type" of light is also key. This refers to things like the light bulb's color temperature (warm yellow light versus cool blue light) and how wide the light spreads out. A narrow beam might be good for highlighting, while a wider beam is better for general room illumination.
The "trim" is the part you see from below, and there are many different styles. Some trims are very simple and blend in, while others might have a specific look, like a baffle trim that helps reduce glare, or a gimbal trim that lets you direct the light. Picking the right trim can really change the final appearance of your recessed lighting installation. You also need to think about the "lighting" itself – this means the actual light source, whether it's an LED, halogen, or another kind, and its brightness. All these little choices really add up to the overall effect.
Gathering Your Supplies for Recessed Lighting Installation
Getting ready for a recessed lighting installation means having the right items on hand. You don't want to be halfway through the job and realize you're missing something important. A little preparation here can save you a lot of time and frustration later. It's pretty much like getting all your ingredients ready before you start cooking, you know?
You'll need the lights themselves, of course. Make sure you have enough for your planned layout. You'll also need the right kind of wire, which is typically electrical wire suitable for home lighting circuits. A wire stripper will be very handy for getting the insulation off the wires cleanly. You’ll also want wire nuts to connect the wires safely. A voltage tester is pretty much a must-have safety item to make sure the power is off before you touch any wires.
For cutting the holes in your ceiling, you'll likely need a hole saw that matches the size of your recessed lights. This attaches to a drill and makes nice, neat circles. A tape measure and a pencil will help you mark out where each light will go accurately. You might also need a drywall saw if you're dealing with existing drywall and need to make adjustments beyond just the circular cut. A utility knife can be useful for various small tasks, too.
Safety gear is also very important for any electrical work. This includes safety glasses to protect your eyes from dust or debris, and work gloves. If you're working up high, a sturdy step ladder or a small scaffolding unit is essential. Making sure you have all these things before you start your recessed lighting installation will make the whole process much smoother and safer. It's actually a pretty straightforward list, but each item plays a key part.
Can You Really Install Recessed Lights Without a Huge Mess?
The idea of putting in new lights often brings up images of torn-up ceilings and a big, dusty mess. It’s a common worry for people considering a recessed lighting installation. But here's some good news: you often don't have to tear out your whole ceiling to get these lights in place. There are methods and types of lights specifically made for putting into existing ceilings without major demolition. This can save you a lot of time and clean-up, which is pretty great, right?
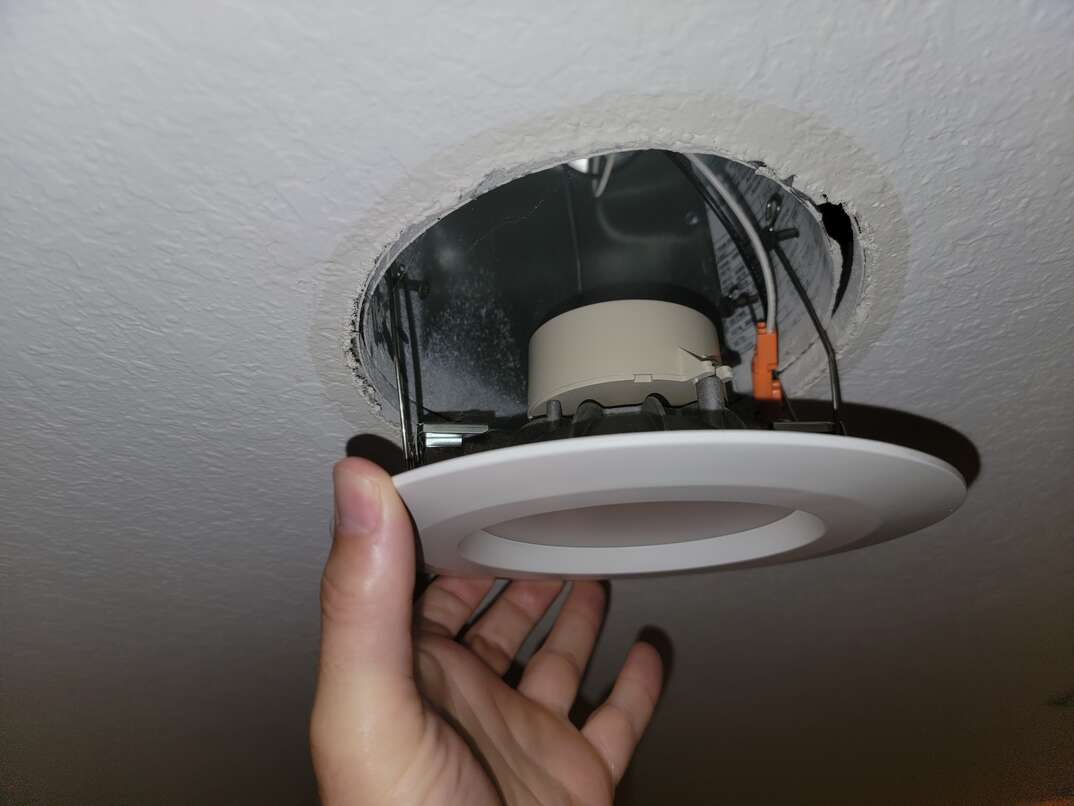
The secret often lies in choosing the right kind of recessed light fixture and using a bit of smart planning. Many modern recessed lights are designed as "remodel" or "retrofit" fixtures. These are made to be installed from below the ceiling, meaning you don't have to go up into the attic or open up large sections of drywall. They usually have clips or springs that hold them securely in place once they are pushed through the cut hole. This ingenuity in design really makes a difference.
For a recessed lighting installation in an existing ceiling, you'll typically just need to cut a circular hole for each light. The wiring can often be pulled through the ceiling space using a fish tape or by working through existing openings. While it still involves some cutting and dust, it's a far cry from taking down entire sections of your ceiling. This approach is much less disruptive to your home and your daily life, which is a big plus for many people.
So, if you've been putting off a lighting update because you dread the thought of a huge construction project, rest assured that with recessed lights, it doesn't have to be that way. With a little planning and the right kind of fixtures, you can achieve that clean, modern look without the headache of a full ceiling renovation. It's definitely possible to do this kind of work with minimal disruption, which is honestly a relief for most homeowners.
Putting in Your Recessed Lighting - A Step-by-Step Walkthrough
Once you've done your planning and gathered your items, you're ready to start the actual recessed lighting installation. Going step by step helps keep things organized and safe. This part might seem a little tricky at first, but if you take it one piece at a time, it's actually quite manageable.
First, and this is super important, make sure the power to the area you're working in is completely turned off at your home's main electrical panel. Use your voltage tester to double-check that the wires are dead before you touch them. This is a step you should never skip, for real.
Next, you'll mark out where each light will go on the ceiling. Use your tape measure to get the spacing right, following your plan. Then, using your drill and the hole saw that matches the size of your light fixtures, carefully cut the opening for each recessed can or canless light. Take your time with this to get clean circles.
Now comes the wiring. If you're using can lights, you'll typically connect the house wiring to the junction box that's part of the can fixture. For canless lights, they usually have their own little junction box built right in. You'll strip the ends of the wires, twist the matching colors together (black to black, white to white, ground to ground), and secure them with wire nuts. Make sure all connections are tight and secure. This is where attention to detail really matters for your recessed lighting installation.
After the wires are connected, you'll gently push the light fixture up into the hole. Most remodel-style recessed lights have spring clips or tension clips that will hold them firmly in place against the ceiling. Push until the fixture is flush with the ceiling surface. It should sit nice and flat.
Finally, you'll put on the trim piece. This is the decorative ring that finishes off the look of the light. Trims usually snap into place or are held by springs. Once the trim is on, you can put in your light bulb if it's a fixture that uses a separate bulb. If it's an integrated LED, you're pretty much done with that particular light. Then, you can turn the power back on and test your new recessed lighting installation. It’s a good feeling to see them light up for the first time, you know?
Choosing the Right Look for Your Recessed Lighting Installation
The kind of recessed lights you pick can really change the feel of your room. It's not just about getting light; it's about how that light looks and how the fixture blends into your home's style. There are quite a few options, and honestly, picking the right one is part of the fun of a recessed lighting installation.
While most people think of round lights, you can actually find alternative styles, like modern rectangular ones. These can add a very distinct and contemporary touch to any space, giving a different kind of visual interest than the classic round shape. If you have a very specific design idea for your room, looking beyond the usual circles might be a good idea.
Beyond the shape, the "trim" is where a lot of the visual style comes in. There are trims that are very simple and designed to disappear into the ceiling. Then there are baffle trims, which have ridges inside to reduce glare and make the light less harsh. Gimbal trims let you tilt the light, which is great for highlighting artwork or a specific wall. There are also shower trims that are sealed to protect against moisture, perfect for bathrooms. Each trim type gives a slightly different visual and functional effect.
Think about the finish of the trim, too. You can get white, black, brushed nickel, bronze, and more. Matching the trim finish to other metal elements in your room, like door handles or cabinet pulls, can help create a very cohesive and polished look. All these little details contribute to the overall appearance of your recessed lighting installation and how it fits into your home’s design story.
Finishing Up Your Recessed Lighting Project
Once all your lights are in and the power is back on, you’ll want to do a final check of your recessed lighting installation. Make sure every light turns on and off as it should. If you installed them on a dimmer switch, test that the dimming function works smoothly across the range. This final check helps confirm everything is working correctly and safely.
Take a moment to step back and look at your room with the new lighting. Does it feel brighter? Does it highlight the areas you wanted it to? Sometimes, after seeing the lights in action, you might want to adjust the direction of any lights with adjustable trims. This is your chance to fine-tune the illumination to get the perfect effect for your space. It's pretty satisfying to see the finished result, you know?
Keeping your home bright and inviting while creating a modern, streamlined look is actually pretty easy when you start with a good plan and follow the steps for a recessed lighting installation. These lights offer a sophisticated and functional way to transform how your home looks and feels. They provide a clean, uncluttered appearance that can really make a difference in any room.
How To Install A Recessed Ceiling Light | Shelly Lighting

How to Install Recessed Lighting?
How to Install Recessed Lighting
